Notes on outdoor ovens and bakery
I'm interested in one day creating and running a community oven, perhaps in times of disaster and preparation for low-technology survival.
Here are some notes, which I've modified, from Muddy Fork Bakery, Crafting Artisan Breads.
Why did I virtually make a copy of these notes? Browse some of the copious numbers of links in my pages that lead nowhere now. I would not have made the links if I had not thought the information important. Now it's gone. This information will remain.
The oven has a hearth that is 5' wide by 7½' deep by 12"-18" high.
The hot oven core is made of firebricks and high-temperature mortar, built to a 9" thickness in the hearth, walls and dome. It is well insulated and can retain an immense amount of heat for days.
Firing the oven
Begin the process two days before baking by firing the oven on Thursday morning. Load it with scrap wood from local woodworkers and sawmills and light the fire at the front.
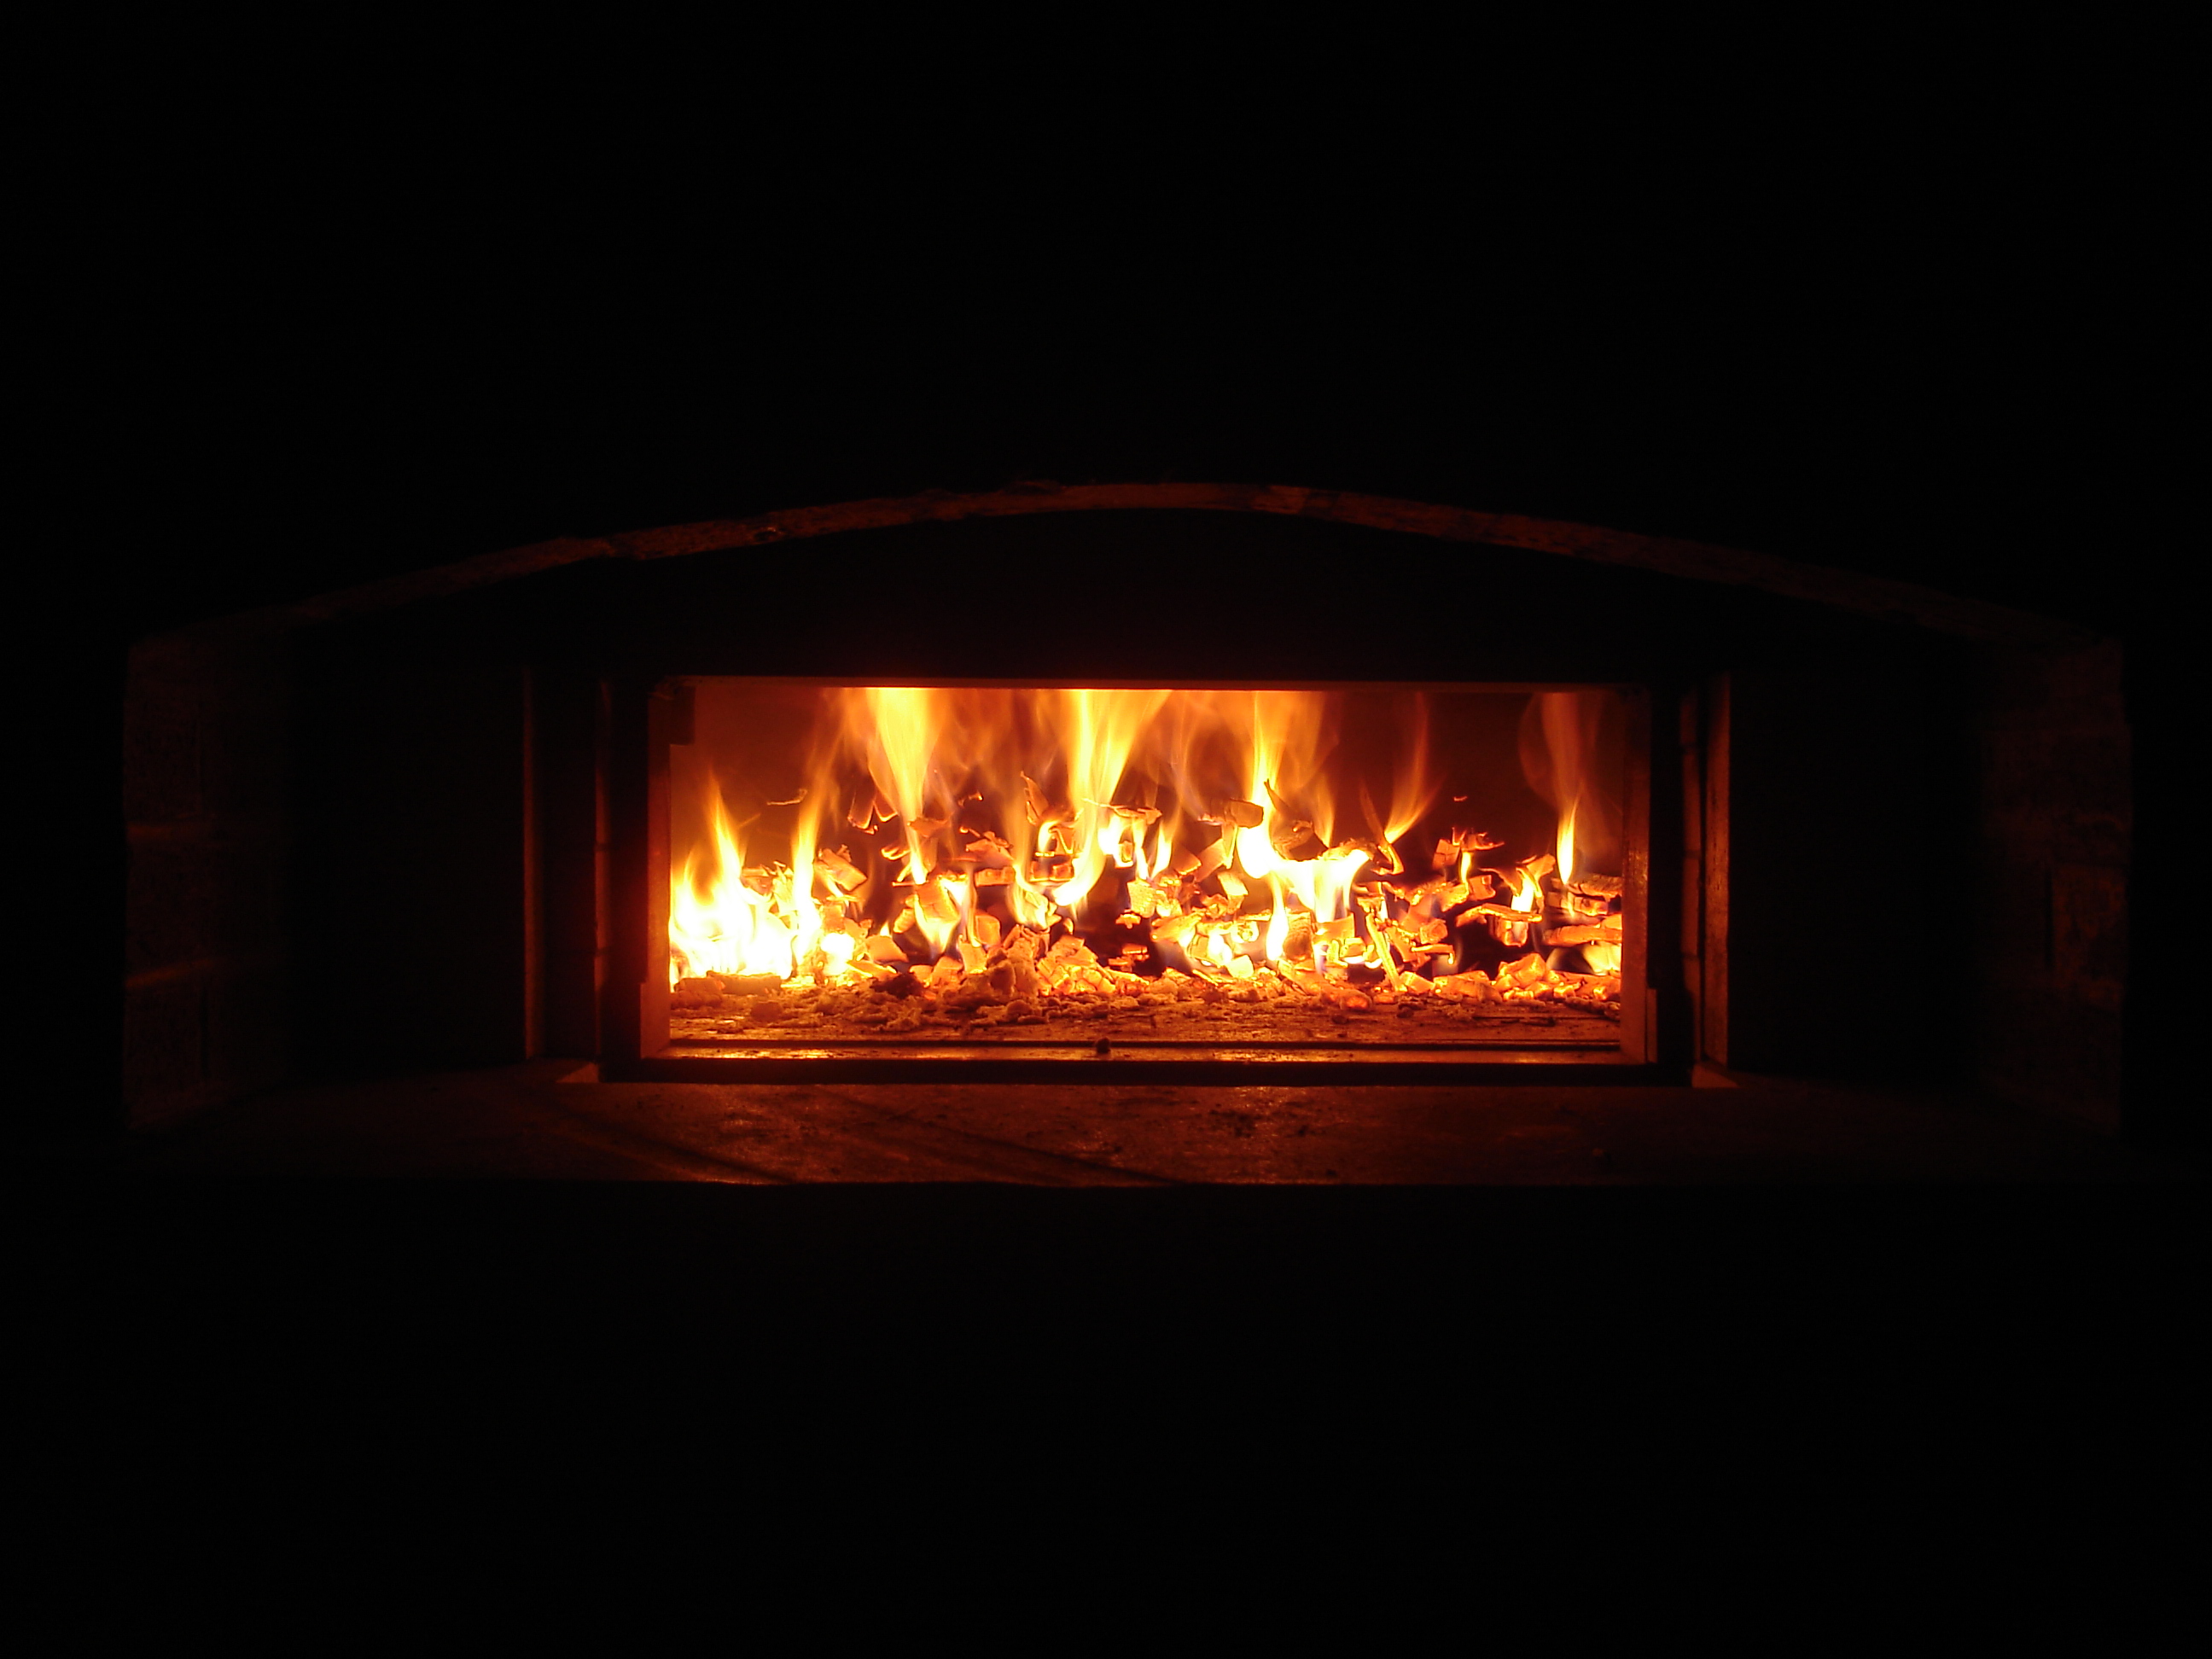
That's right: you build a fire right in the oven, let it burn for hours or even days to warm the masonry, then you clean it out and bake the bread in the heat left in that masonry. No, really that's the way it's been done for thousands of years. These notes come from an artisanal, but nevertheless commercial bakery that get several batches of bread out of one light.
Over a six- to twelve-hour period, the fire burns from front to back. The fire builds heat until it reaches a complete, high-temperature combustion (smoke and soot is burned off).
The first, small load of wood brings the temperature up from about 300° to 450°.
That evening (Thursday), fill the oven and light a fire that will burn down to coals by (Friday) morning, bringing the masonry temperature up to about 550°.
(Friday morning) light a last, small fire to bring the oven up to temperature. The fire burns out late (Friday) afternoon. Place a heavy, insulated door in the opening and let the heat equalize throughout the masonry for 8 to 10 hours.
Before retiring (Friday evening), open the door briefly to clean the ash from oven with a brass-bristle brush and swab it out with a wet cotton rag.
The oven is ready at 0200 the next morning (Saturday), when the masonry will be an even 585°to 600°.
Bread baking
Keep a natural sourdough culture.
The night before (Thursday) mixing dough, mix enough fresh starter to leaven most of the loaves.
Take careful note of the ambient temperature and adjust the amount of ripe starter to add so that in the morning, the batch of starter has fermented just the right amount. (This demands accumulating experience.)
Prepare a pouliche (yeasted sponge) to be used after fermenting.
(Friday morning) mix dough with a machine.
Fold the dough (by hand) rather than kneading it many times during fermentation with between 30 to 40 minute periods of rest.
When dough has fermented sufficiently, turn it out on a wooden-top table and scale into loaf-sized patons (loaves).
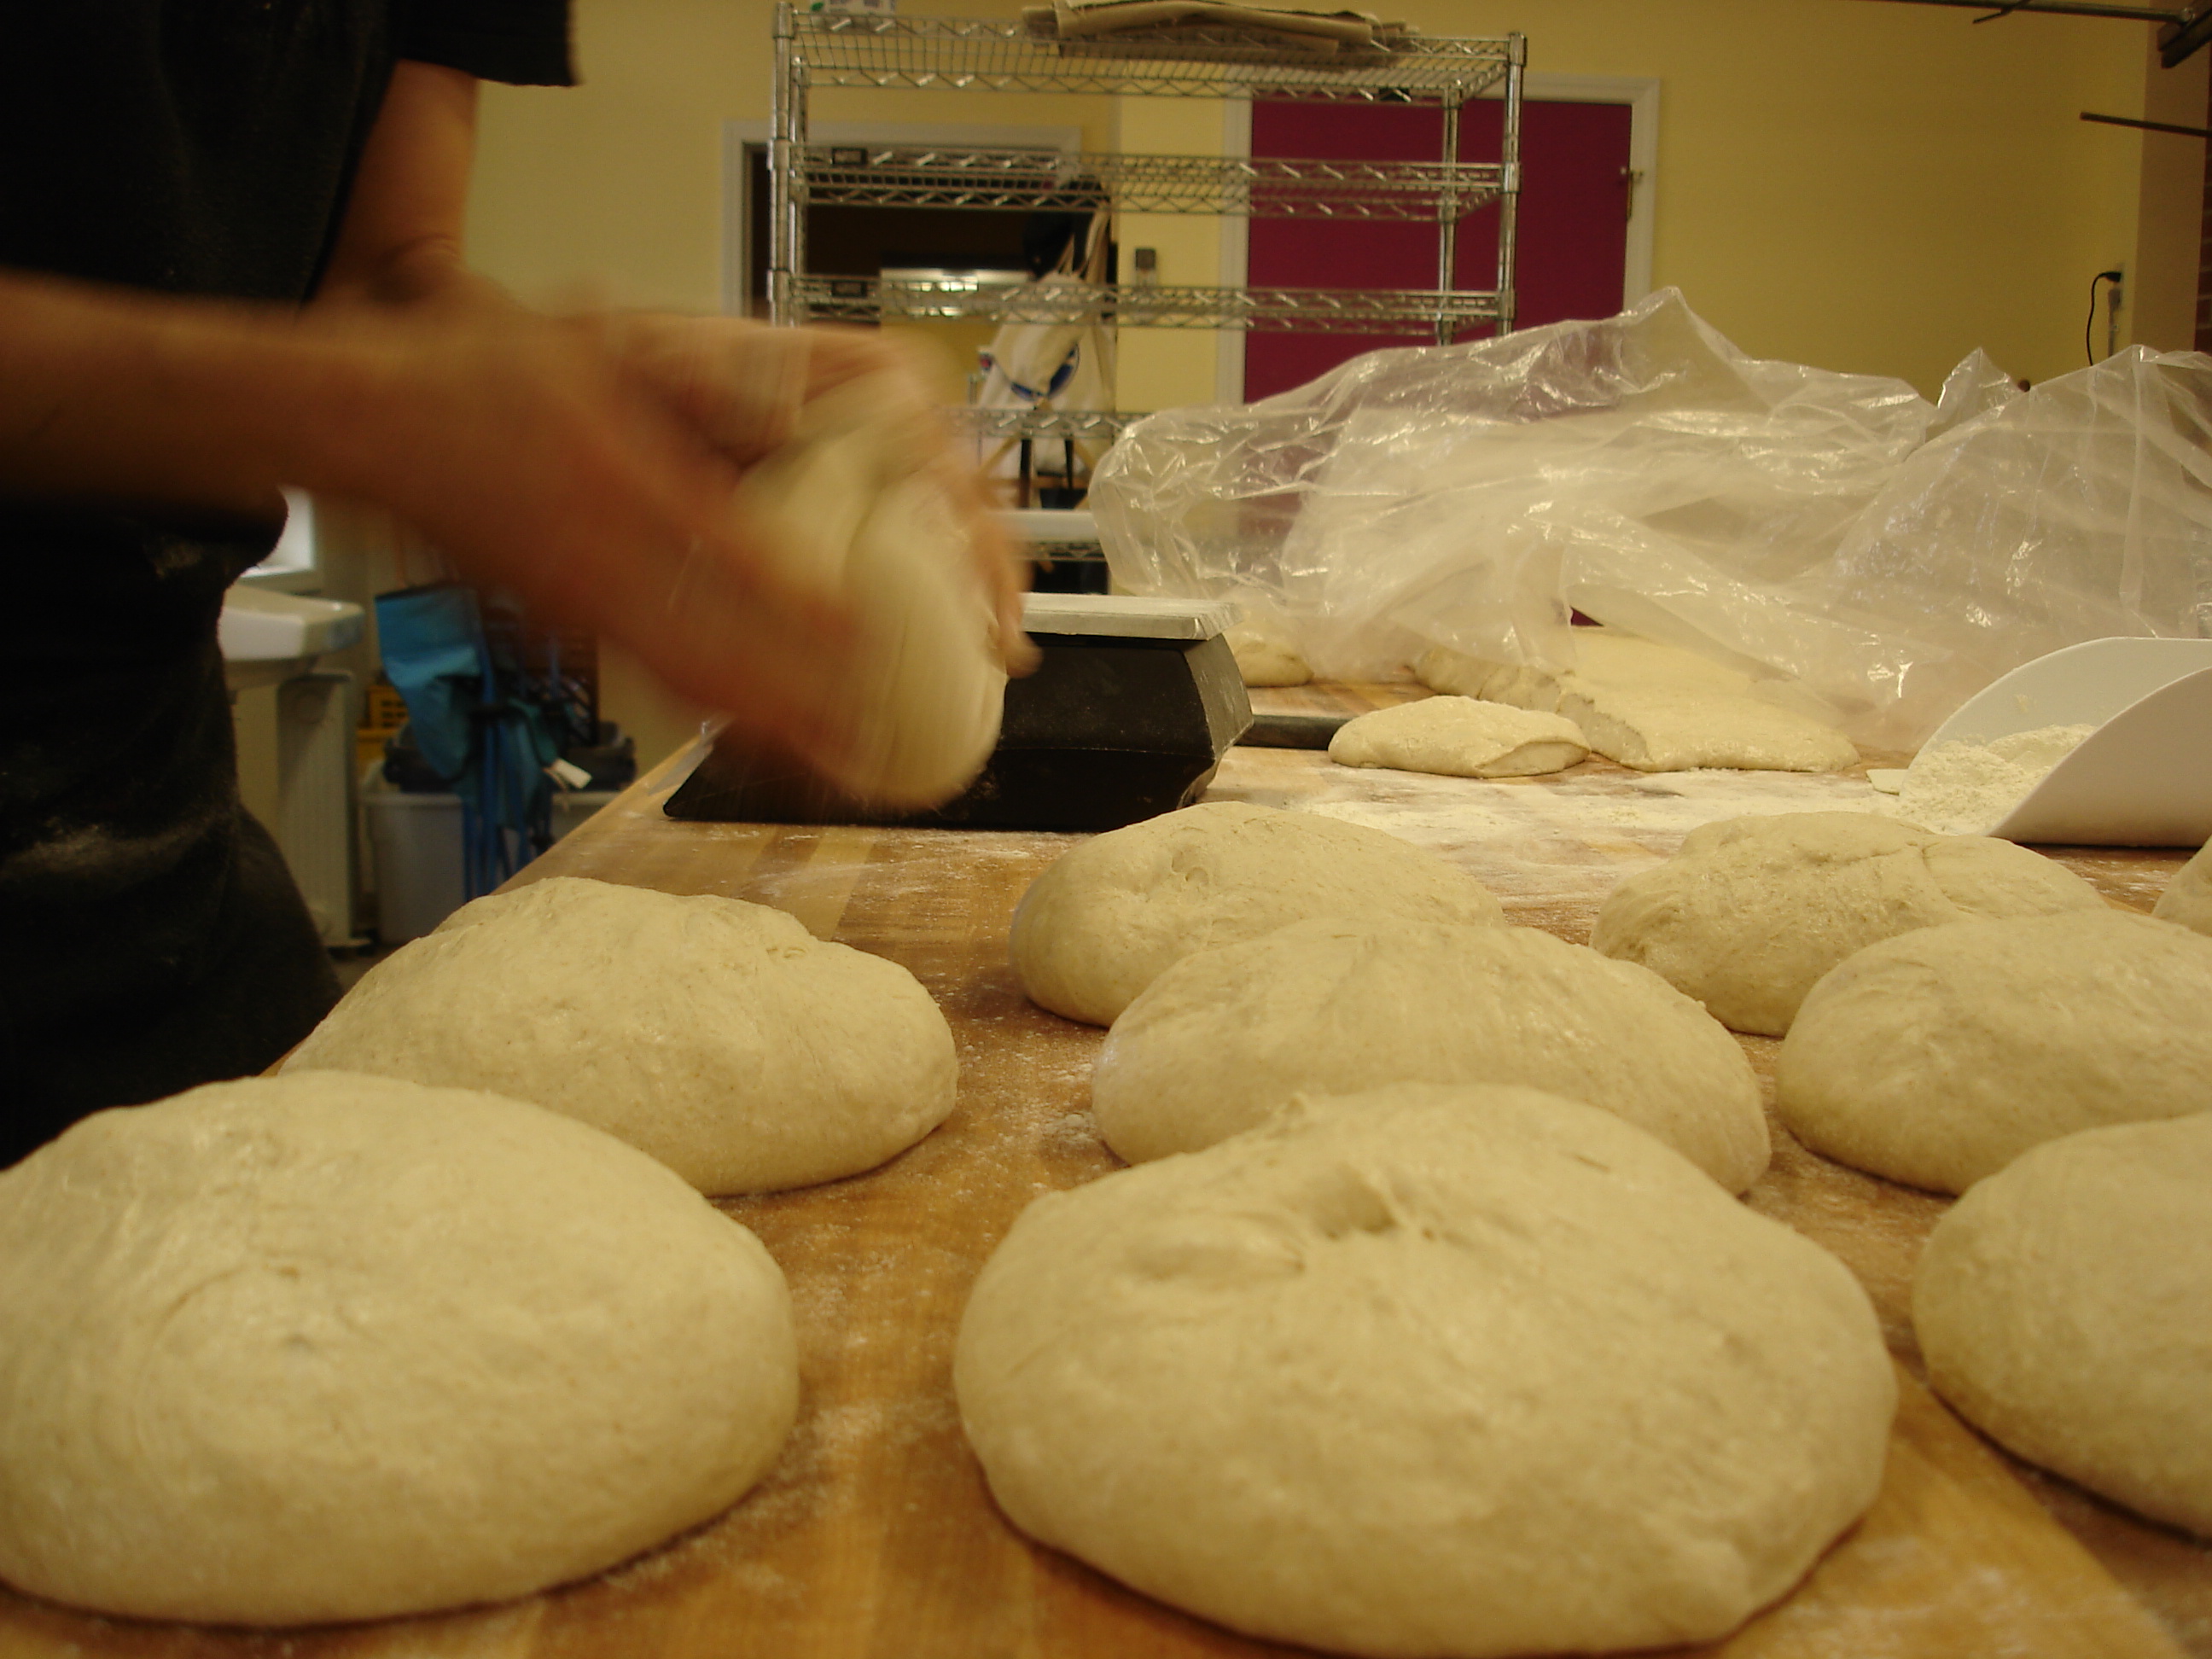
Round each paton and let it rest on the table, then shape and drop it onto a floured cloth or parchment paper in a banneton (basket) for proofing.
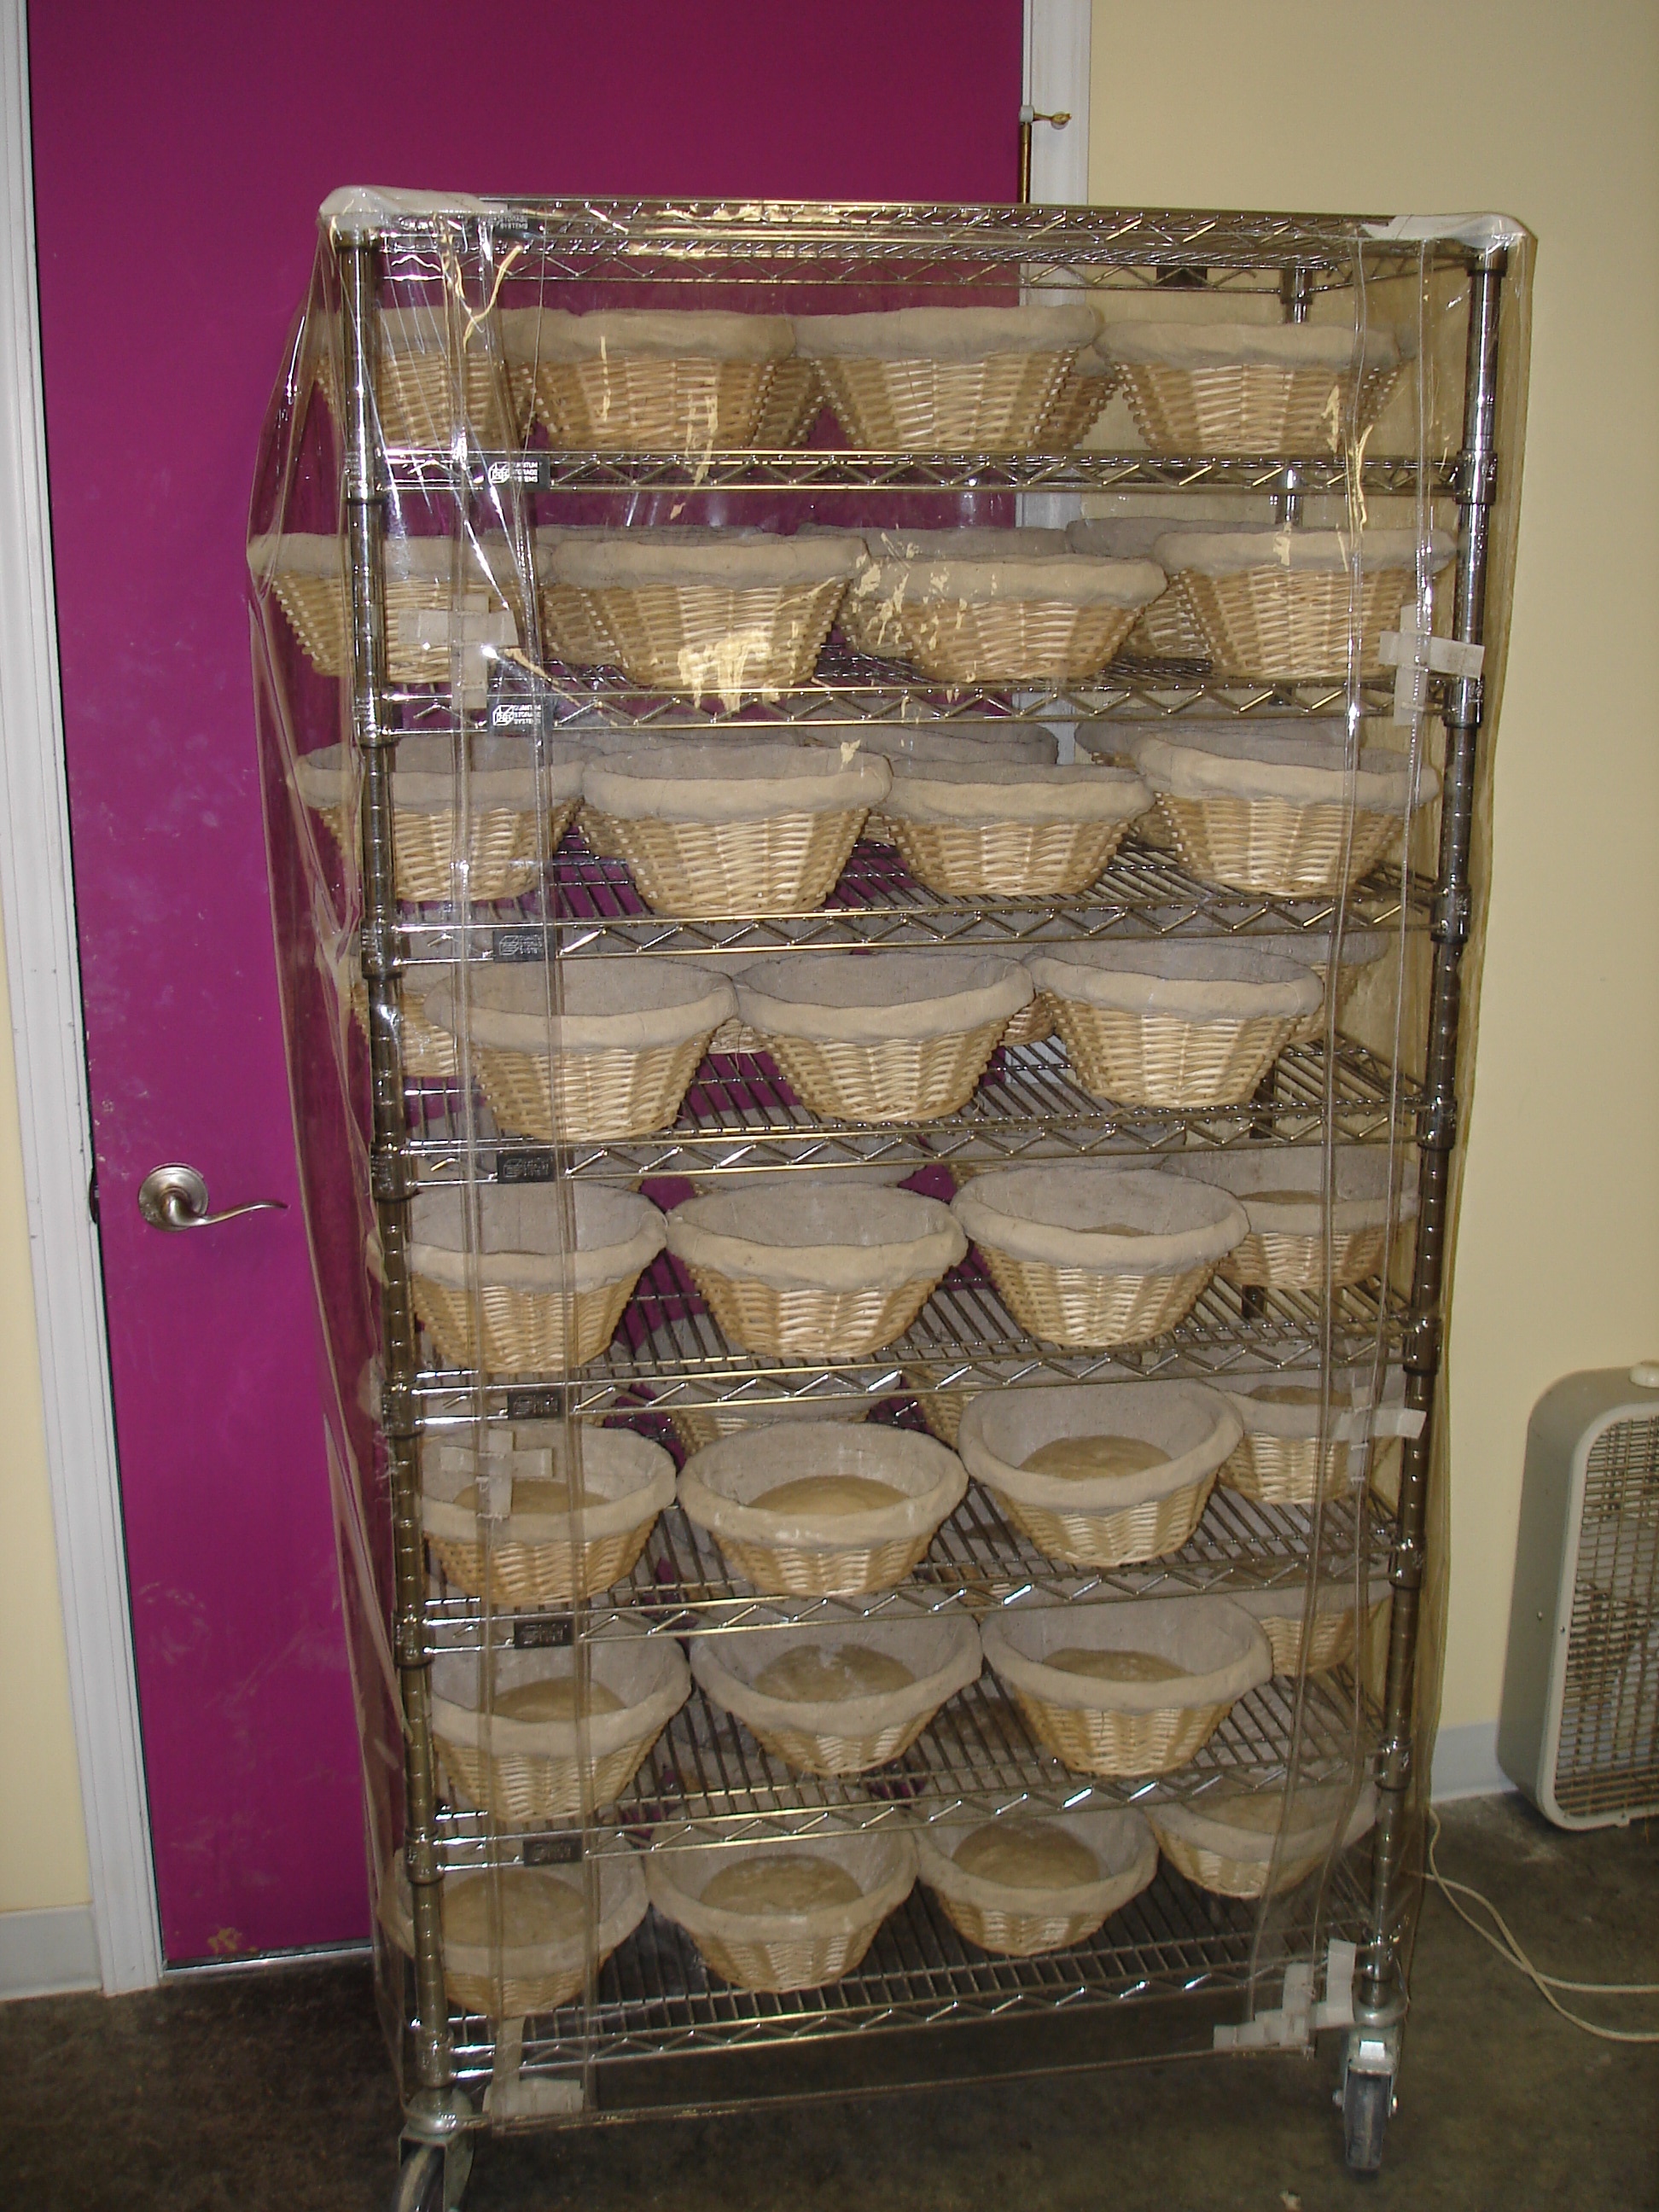
Once sufficiently risen, move to cooler environment to finish the rise. Failure to slow the rise will result in uncontrolled loaf shape, over-inflation and premature weakening of the loaf. Continue to proof until early morning (Saturday).
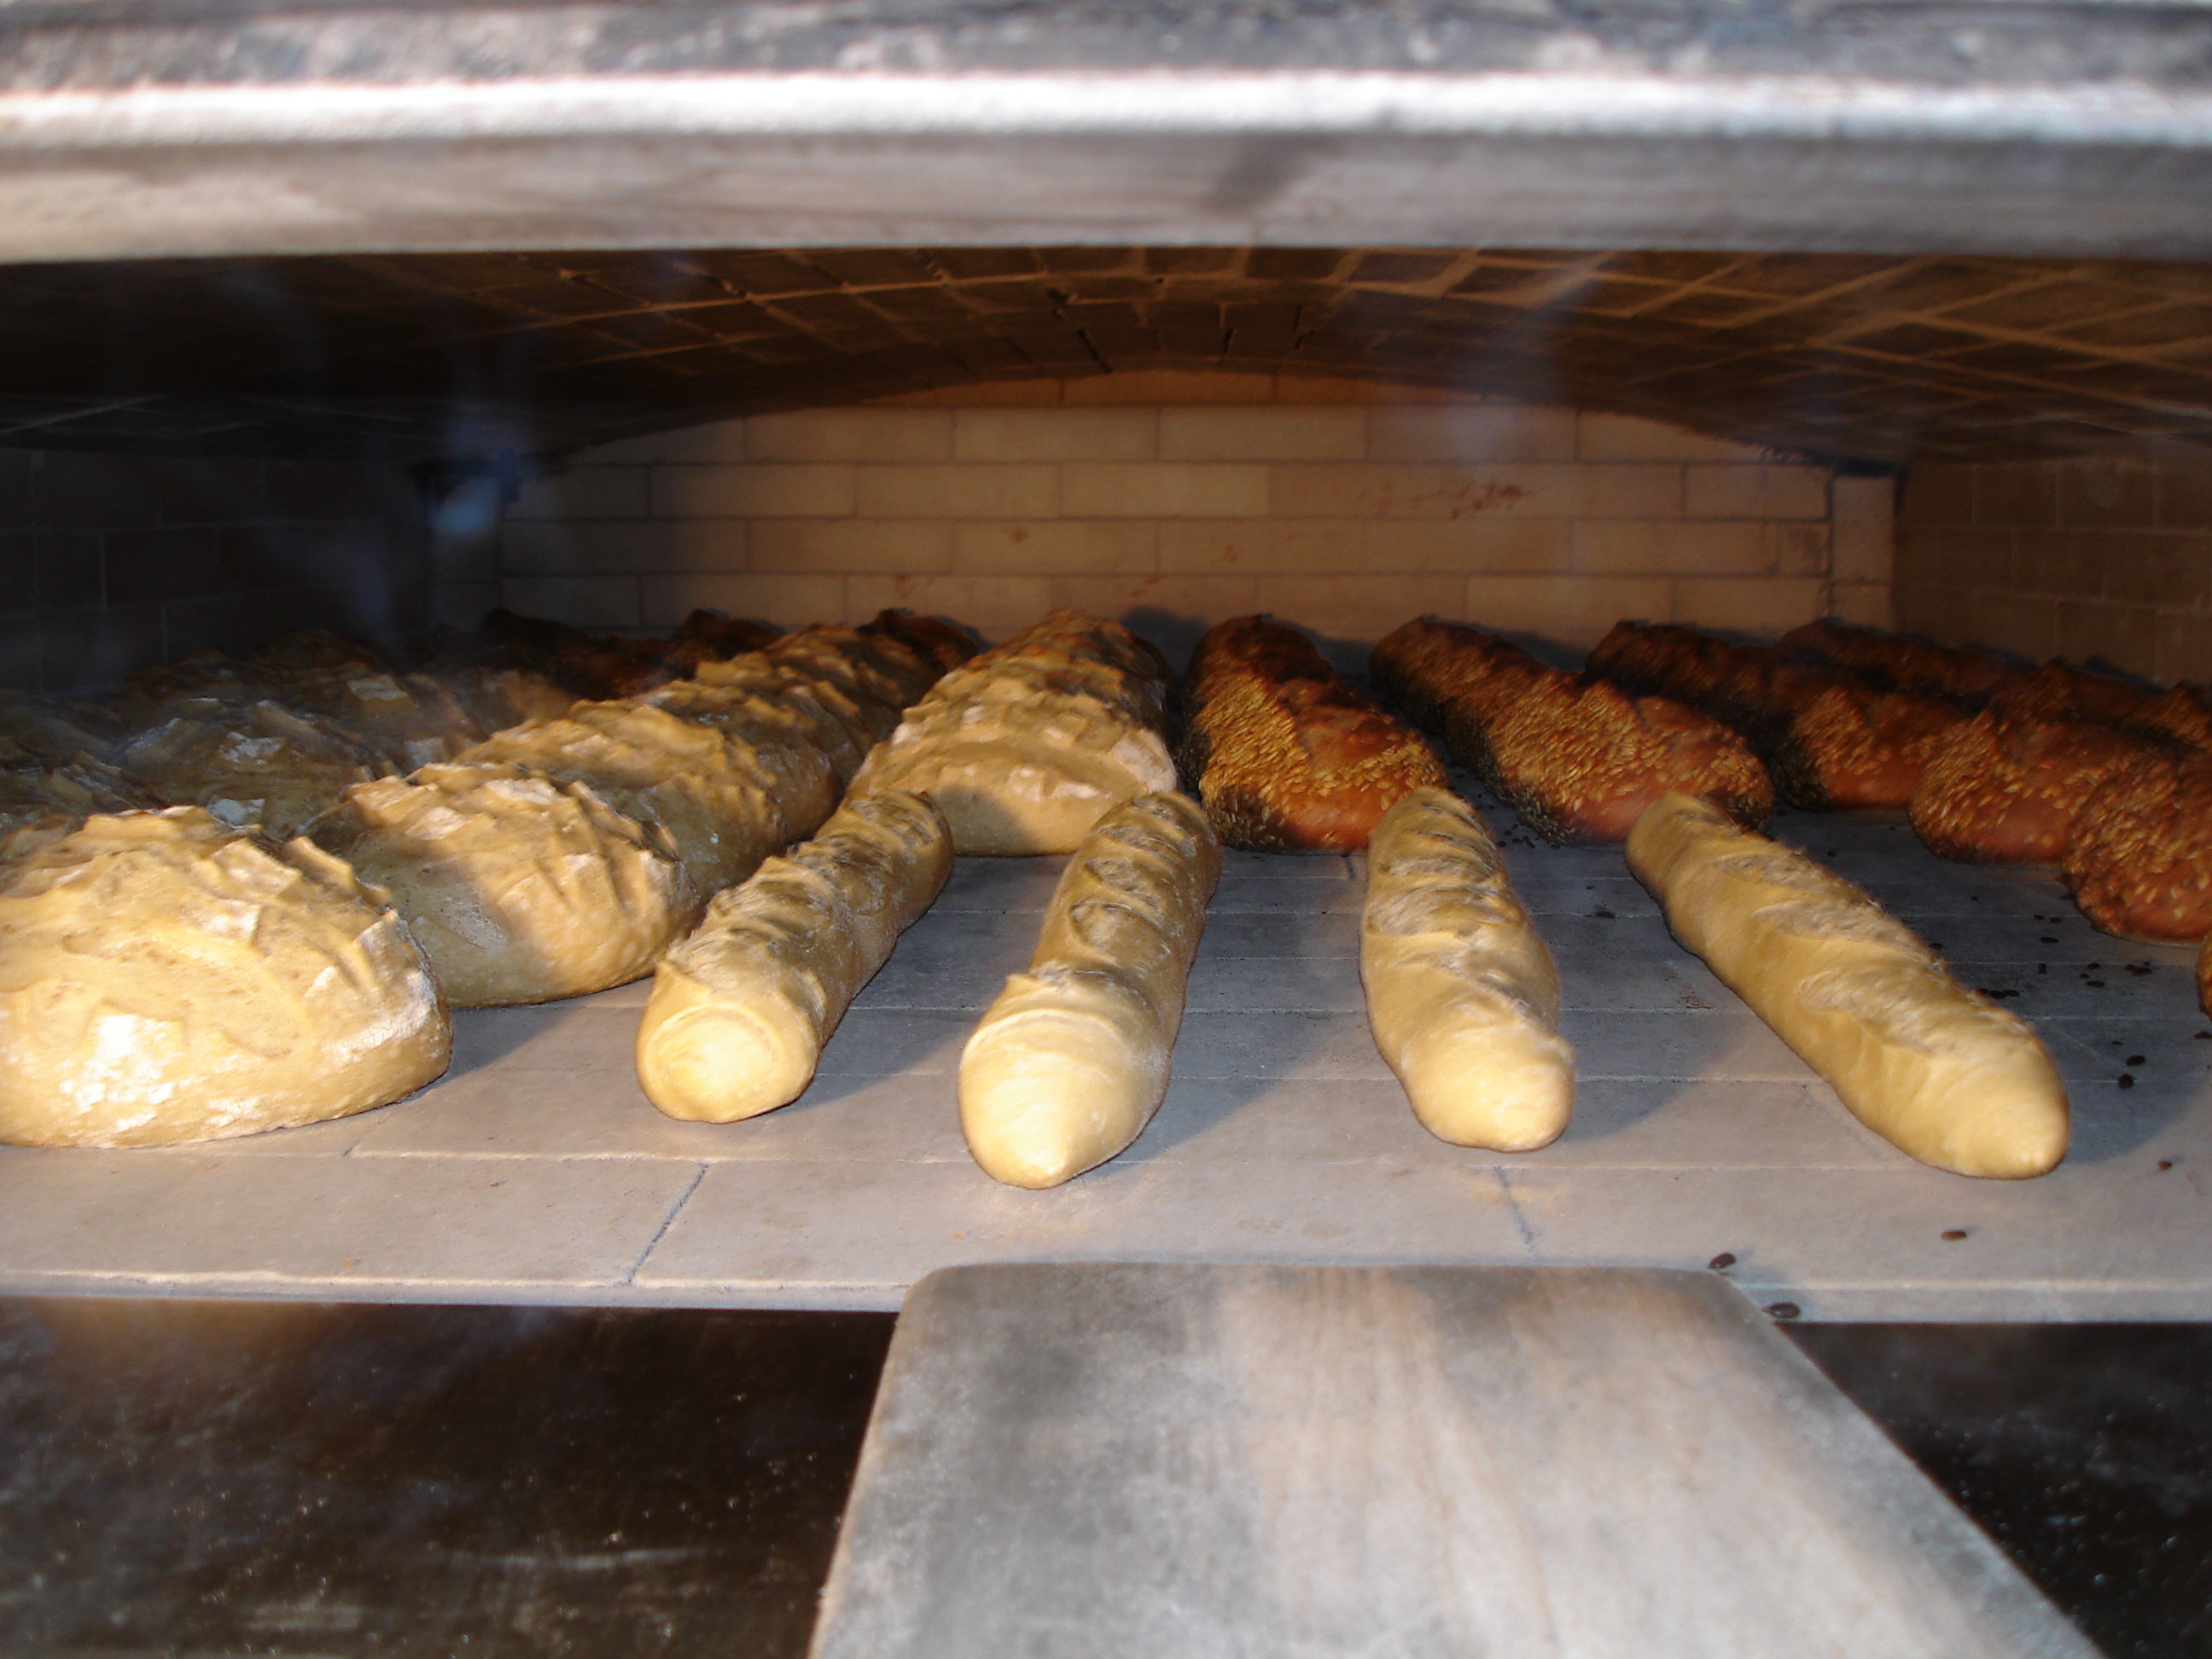
Early (Saturday) morning the oven should be just under 600°. Score the paton (loaf) tops with a razor blade. This makes them break where cut rather than randomly elsewhere.
Load the first loaves directly on the floor of the hearth with wooden peels. The rapid heat transfer will cause the loaves to spring to nearly double their size.
Once the oven is full, the baking loaves produce their own steam in the sealed chamber, which billows out when the door is opened.
The oven (of the size given earlier) holds about 72 loaves.
Whole grain loaves are loaded first in the right half of the oven. Rustic loaves are loaded which spring more and require a more steam-saturated oven.
A space is left at the front of the oven for a peel full or two of baguettes which bake more quickly.
After each load of bread is removed, sweep the burned flour and seeds from the oven and let the oven rest for 10 minutes to regain heat rising from the deeper layers of brick up to the surface.
After several loads of bread, the oven cools below 500° and pastries can be baked.
Here's a separate testimony, though the guy has some wrong ideas about temperature...
"Here's the latest sequence of firing up the oven:
- At 1600 start the fire in the oven. I use mostly hedge (Osage Orange). I load up almost the entire oven with a layer of wood, but I stack it with small sticks near the door to start the fire.
- Once the fire starts and a few coals have formed, I push some of the coals back into the oven and load some more wood into the oven. I'll do this every 30-60 minutes, sometimes adding wood, sometimes just moving coals around. The idea is to get some coals to all corners of the oven. It takes around 4-8 hours to accomplish this. You know you are getting the oven hot when the soot burns off the walls of the oven and there are no more black splotches on the side. If one area is still black, scoot some coals into that area.
- I usually try to put some big diameter pieces of wood (6-8") in late at night so I won't have to get up frequently at night to load up the oven. Even then I have to get up twice during the night, usually 0230 and 0500.
- I try to get the dome temperature as close to 500° as I can. If it is the morning of baking day and it's only up to 450°, I settle for that. I then close the door of then oven, letting the remaining coals burn out. To get the dome to 500°, the hearth is usually up to 900°, which is way too hot to use. It takes about 6-8 hours for the oven to cool down. To bake bread, the hearth temperature needs to be below 500 degrees. (525° is OK if using bread without oils).
- By late afternoon, I'm usually ready to bake. Most loaves finish in about 25-35 minutes.
Make a sourdough start
See How to Make Your Own Sourdough Starter, Cooking Lessons from the Kitchen.