The measurements given for flour are weights because of the wild inaccuracy of measuring flour volumetrically. Very roughly, 4 oz. is 1 cup while 12 oz. comes to 3 cups for a total of about 4 cups of flour per pound. Right-click on images at right to see it full size.
For a country-style loaf (boule de campagne), use unbleached flour (what is called "yellow flour" in France, and make a round loaf. For a simple loaf, bâtard, baguette or ficelle, use bleached flour and make the corresponding modification to shape.
Yield
Yield: one 1-pound loaf
|
| ||||||||||||||||||||||||||||
The night before...
1. Thoroughly mix yeast, honey, flour and slightly warmed water in a bowl. Cover with plastic wrap and refrigerate overnight.

Preparation
2. Mix remaining flour and yeast, adding sponge and salt. Set aside covered for 20 minutes to autolyse.
3. Knead on medium speed for 5 minutes. Ball should be barely dry enough to pull away from the bowl in the mixer.
4. Heat water in a rectangular pyrex dish to boiling in microwave. Set in oven on lowest rack. Lightly grease a bowl to receive dough. Place in oven for 1-2 hours to raise. The dough should double.
5. Place dough on lightly floured surface. "Knuckle" it, that is, press down into the dough with knuckles or fingertips without much violence (don't knead it), tri-fold like a wallet, rotate 45°, knuckle and tri-fold again. Do this a third time. Cover with towel for 10 minutes.
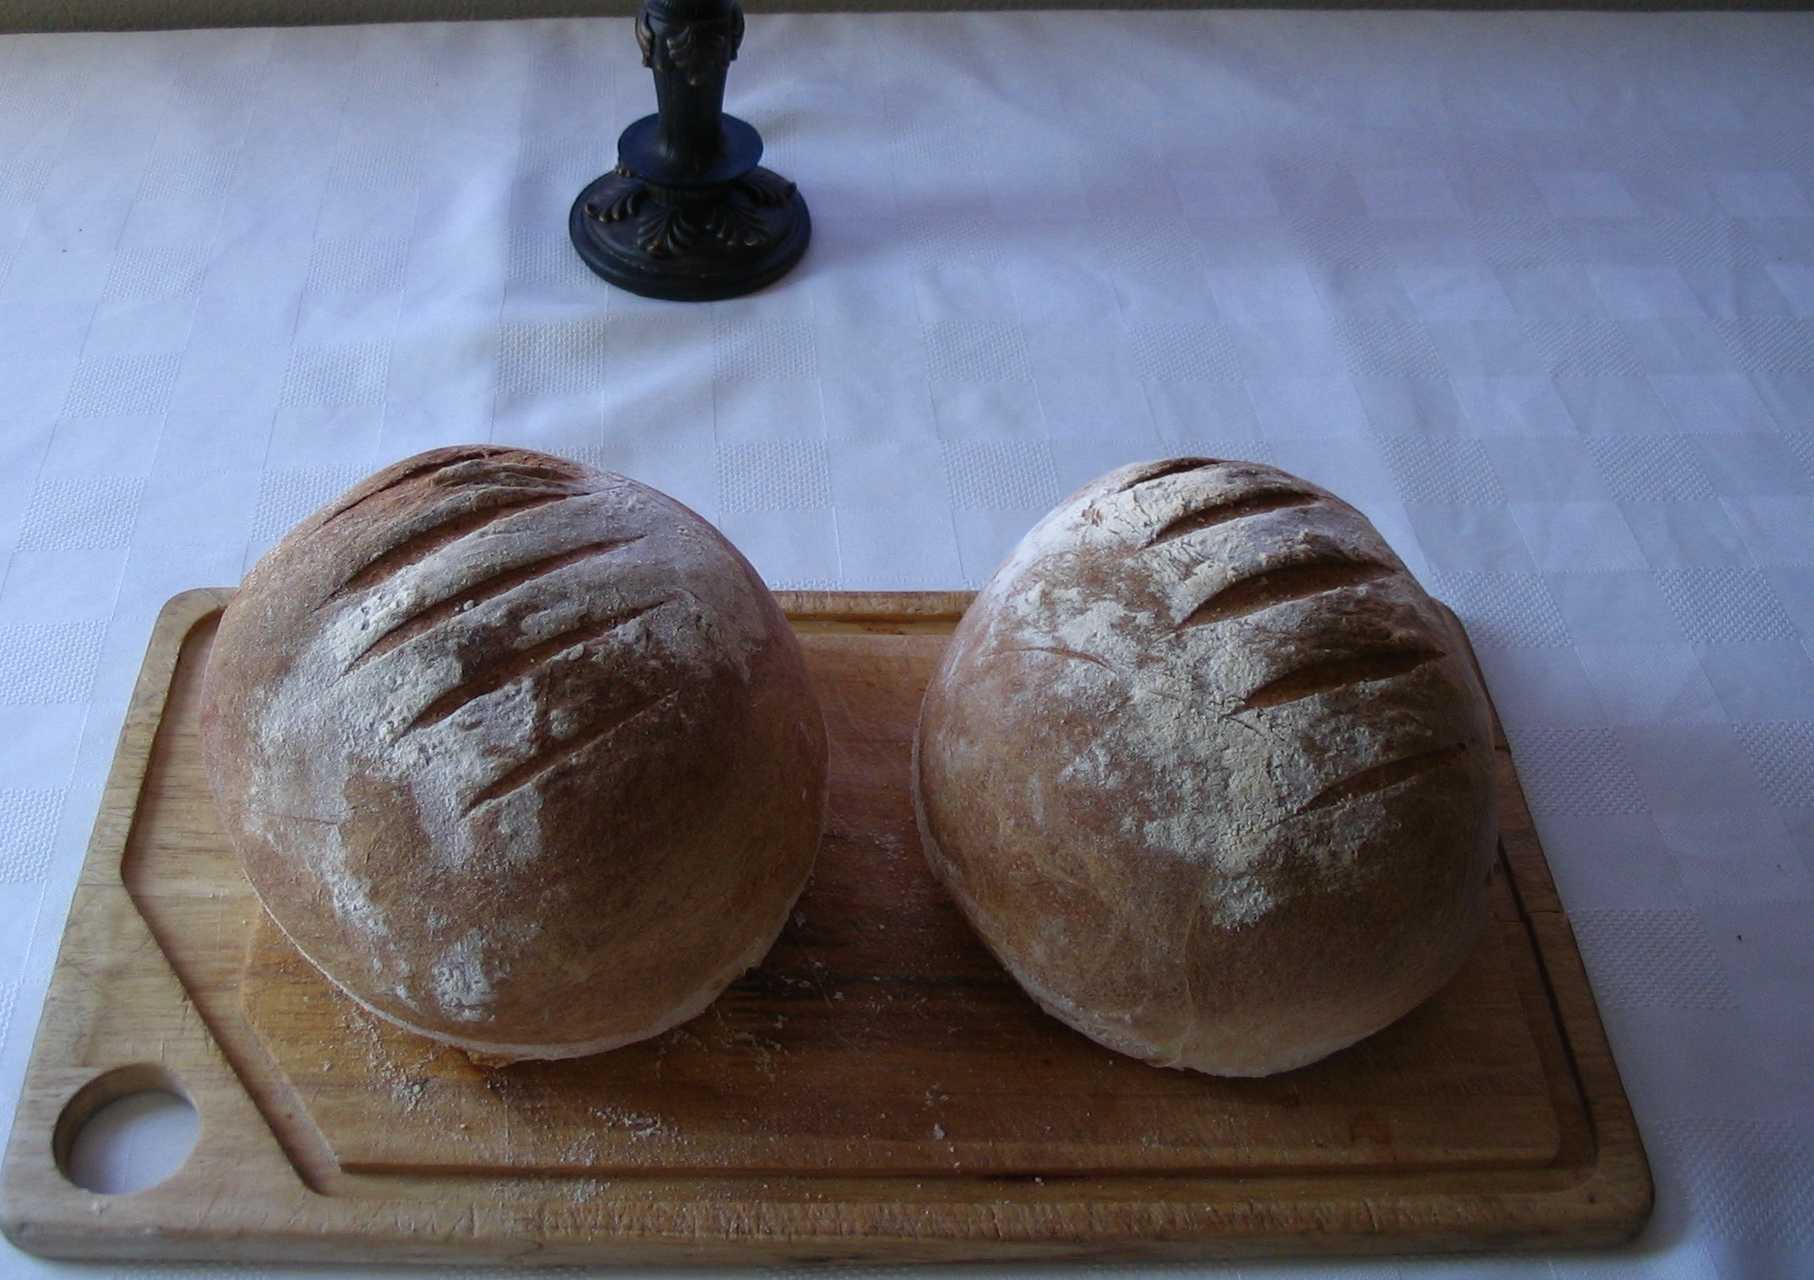
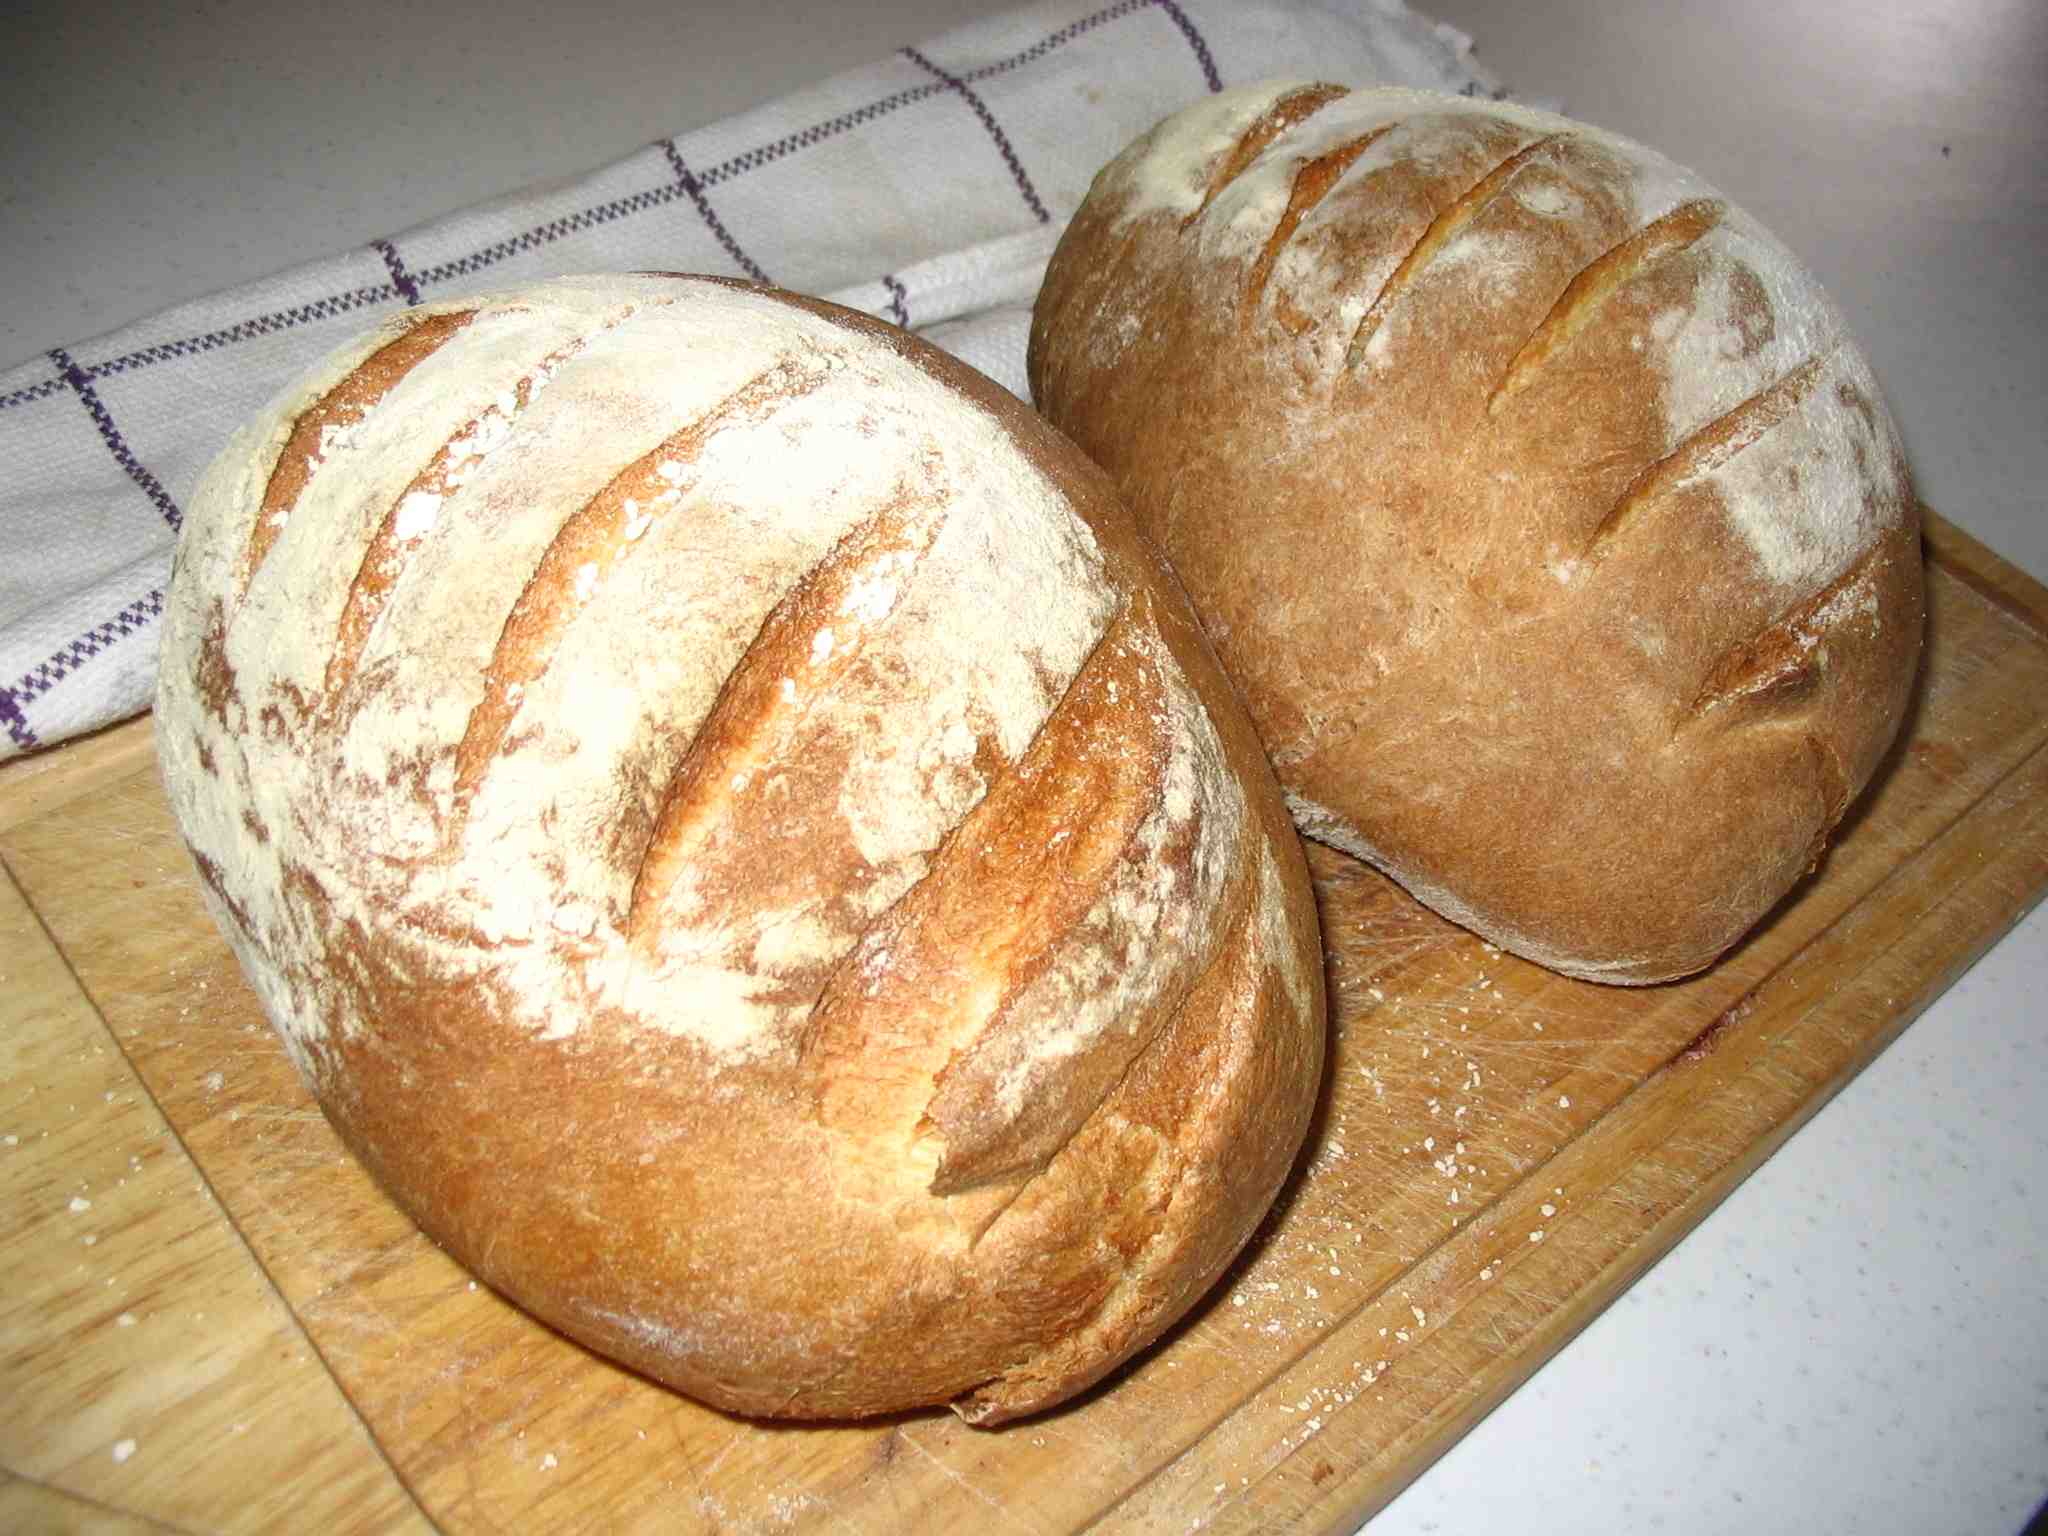
6. Flatten dough, then fold in on self from all sides and corners to make a round ball. (At this point, dough can be divided into more than one, smaller loaf if desired.) Pick up and continue to tuck in botton and tighten the top. Set on counter and even by coaxing it with hands, rotating it until spherical. Set on peel sprinkled with corn meal. Cover and allow to raise for about 1 hour (back in the moist oven).
Baking
7. Reheat oven water supply and preheat oven to 400°.
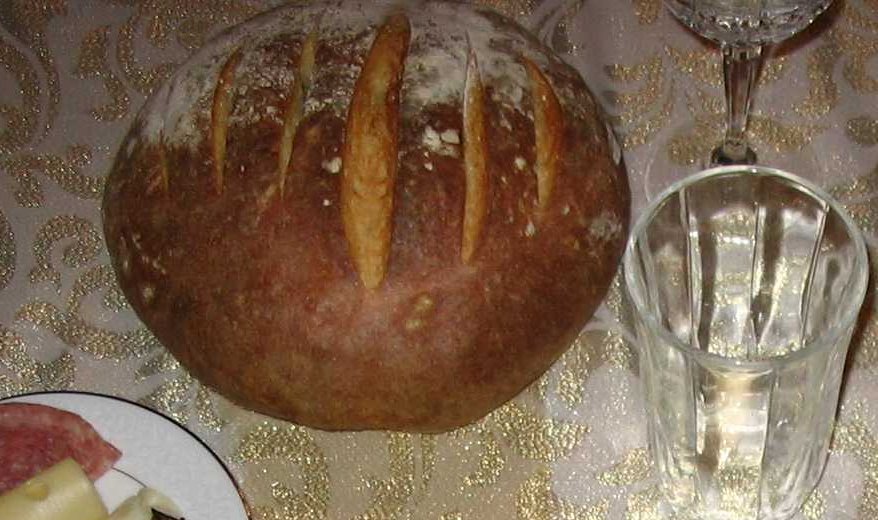
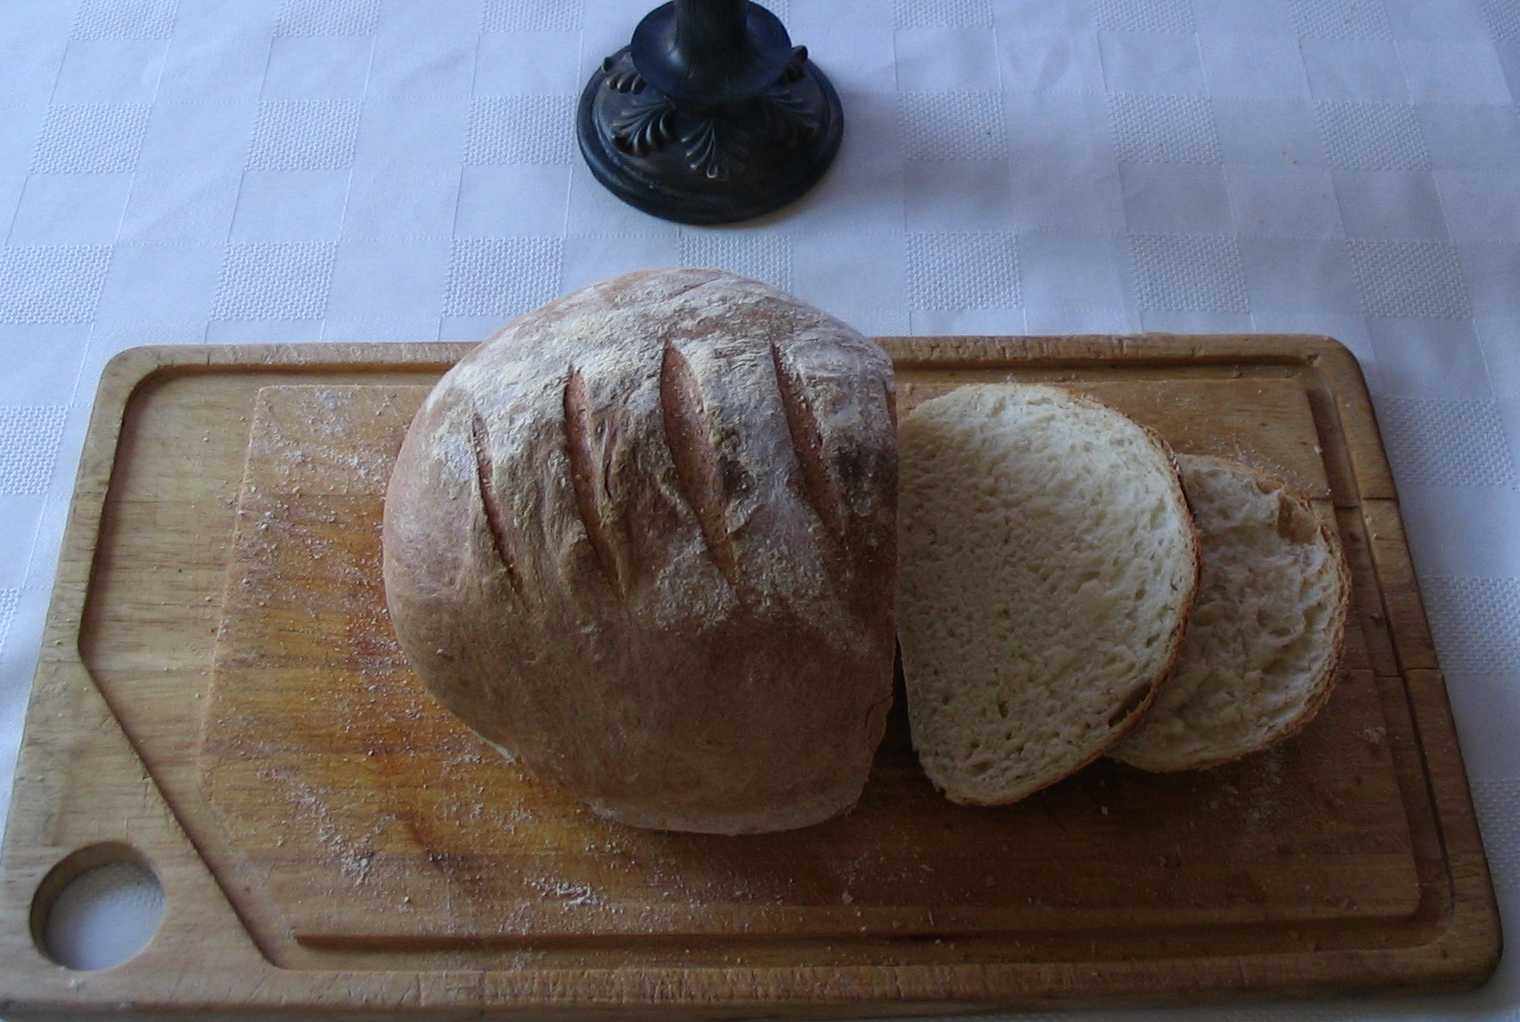
8. Glaze the dough by brushing a mixture of 1 tbsp of cornstarch in½ cup of water. Cut patterns at least ¼ inch deep, but no more than ½ inch deep in top with a very sharp knife (serrated knife works well). Take care not to mangle the top or deflate the dough too much.
9. Bake on stone or tile 1 hour until internal temperature reaches 205°-210°.
A baking stone can be approximated by purchasing a large terra cotta "saucer" from your home center--the kind that you put under a flower pot to catch any water that leaks down through the hole in the bottom of the pot. Place this in the oven before turning it on so that it heats up at the same time.
Comments, especially for beginning bread-makers...
It has been asserted to me that a mere recipe isn't enough, that it's necessary to stand next to someone. I certainly sympathize with this and a few buddies and I paid a Thai lady to teach us the recipes you see elsewhere on my site.
Therefore, here are some supplemental notes because I do not indeed follow the above recipe which was formulated mostly by watching Alton Brown's Good Eats episode entitled "Dr. Strangeloaf." (I have been making bread for over a decade and have my own ideas.)
First, I don't use my KitchenAid® because it's expensive and I don't want to have to replace it very soon. I do this all by hand and I find kneading therapeutic.
I don't use bread flour or not 100% bread flour; I prefer unbleached, all-purpose. It has a nuttier flavor.
Third, the sponge doesn't have to sit in the refrigerator overnight, but only a few hours out of the refrigerator before making the bread. So, it's possible to start at 7 in the morning and begin making the bread at noon.
Nevertheless, if I make bread on Sunday, I usually do the sponge the night before, but get it out and set it on the counter at 7 the next morning before church. I come home at noon and start at step 2. To start step 2 with a sponge fresh from the refrigerator instead of room temperature delays the bread by at least an hour.
If I don't go to church until noon, I leave the sponge on my counter overnight and am able to make bake the bread before leaving.
Fourth, as I knead the dough (step 3), I work in a little more flour to a) keep my hands from getting too icky and b) because the dough needs a little more (no pun intended, but hey, levity is the leavening of life—hehehe).
In step 4, I already have my bread stone in the oven which I heat to 135°—the lowest temperature my oven can go to without being off. I put a Pyrex dish in the oven with 4 cups of water hot from the tap and heated for 5 minutes on HI in the microwave. Then I turn off the oven. This is if I'm in a hurry. The oven is a good place to raise dough, however, because there are no drafts. For the raising process...
My dough kneaded, I wash out the bowl in which I autolyzed the dough, then dry it and spray it with butter-flavored Pam cooking spray. Then, I spray the dough ball itself with Pam, plop it into the bowl, Pam-side down, then spray again. This keeps the dough from drying out during the rise and it doesn't seem to hurt the flavor.
I then put the bowl into the oven and wait for it to double, a couple of hours depending on my kitchen's ambient temperature (despite preheating the oven).
I follow the other steps for making loaves, though I usually double or triple the recipe and so make 2, 3 or 4 loaves with it. I only cut the surface of the loaf seconds before inserting into the oven which I preheated to 450°. Once the loaves are in the oven, I drop the temperature to 400°. It never seems to take an hour to finish the bread; maybe this time is explained by Alton living in Georgia more or less at sea level. Note that if you wait until the internal temperature gets to 205°, the bread will be very, very dark (which I like) and a little disconcerting to American eyes. However, the crust will be tantalizingly caramelized and tasty.
I do not usually glaze my loaves, but instead press the tops, just as I'm setting them aside on my corn-mealed peels, into the reside of flour for a sort of pain de campagne look. I've seen glazed crusts on breads in France, but not often and never on the breads I buy.
Last, don't take the dough's temperature until it's been in the oven for a good 45 minutes: there's no point in ruining it. Poke it underneath.